Author: Carl Shortt, Jr.
This is part three of Carl Shortt’s tips for artists taking good images of their own artwork. See previous posts about the quality of light in Part 1 and Part 2 and suggestions for photographing two-dimensional work here.
3D Work: Basic needs
3D work should be photographed against a background that is neutral or produces a pleasing contrast with the dominant color of the work. The background should also help clearly show the contour or edges of the work.
 |
| Sculpture by Robert Adams, with distracting background |
 |
| Sculpture by Robert Adams with neutral background |
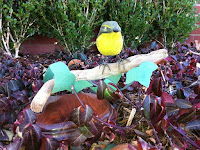
If possible, avoid natural settings unless it is an essential part of the work as it might be in an installation or sculpture.
3D lighting location.
The best photographs are produced with diffused lighting. Light can be diffused in a number of ways: 1. bouncing it from an inexpensive 2” x 2’ or larger white foam core board mounted to an adjustable stand, by shining light through a light tent (see resources at the end for an easy to make DYI Light Tent, 3. or a bed sheet draped over a homemade structure. Look at the online resources listed at the end for lots of lighting ideas.
Lighting 3D work requires one main light or key light and a secondary or fill light to effectively show the shape and texture in the photo image. As with 2D lighting, the illumination should be accomplished with diffused light. After the art work is placed against the correct background required to enhance the work, set up the key light at an angle that will give the best lighting and shadows for the presentation of the object. This is usually from the high left side, even towards the back of the object so that the contour of the object is well presented. The fill light should have about one-third the intensity of the key light. Set up the fill light opposite of the key light at a distance that best fills in some of the shadows. (Fill lighting can be accomplished by moving the fill light source away from the subject or perhaps by bouncing light from the main light onto the subject with a white foam core sheet used as a reflector.)
 |
| Shortt's sculpture in daylight |
 |
| Shortt's sculpture with controlled lighting sources |
Taking the Picture
Once the lighting is set up, make a manual white balance reading with your camera (follow the unique instructions that came with your camera).
Select a low ISO setting of 100 or 200 for increased quality and lower noise
Exposure times may be 1 second or longer, so mount the camera on a steady tripod.
Position the camera/tripod a comfortable distance from the art work (but as close as can be reasonably accomplished) such that the lens is level with, square to and in the middle of the art to be photographed. Zoom in only as much as necessary to nearly completely fill the camera’s frame with the image. Including a portion of the cast shadow can add a sense of depth to the final image.
Triggering the camera to take a long exposure is best accomplished with a remote cable release or by use of the cameras built in self-timer. Merely triggering the camera by pushing the “take” button could easily introduce camera shake and result in a poor picture.
Take several shots. Digital images are captured for free so take several shots of each piece, changing light locations and bracketing exposure on both sides of the camera’s automatic selection. Darker toned objects will usually require increased exposure; more reflective subjects require less.
You could see Shortt's demonstration in action since he is leading the next Artist Survival Kit workshop, "Oh, Snap! Documenting Your Work in Photos," on February 5 at the Oklahoma City Community College Art Department. Prior to the workshop, time slots will be available for artists to sign up to have their work photographed. More details can be found here:www.ArtistSurvivalKit.org.


No comments:
Post a Comment